Friday, November 16, 2012

Pontoon Bridge, Pt. 2

The painting is almost finished. The pontoon boats are Tamiya Medium Blue, the deck is Vallejo Green, and the 'curbs' are Polly-S Mineral Red. I have black washed all the elements to accentuate the individual boards, but I think I have darkened the colors too much, especially the blue. I might try to brighten it up. Here are all the sections on the beginning of a river diorama.
 
 Here you can see the hasty repairs made to the central pontoon. It was hit by a cannon ball, and patched by raw, unfinished planks.
 
The transition deck was also struck by a solid shot, but has yet to be repaired.
 
 
 A quick repair to cover some broken planks.

Comments or questions always welcome.  Don

Thursday, November 15, 2012

Pontoon Bridge, Pt. 1

Stepping away from things OGRE for a moment, several years ago I thought I might find a way to make my hobby help pay for itself. I felt I could mass-produce wargame terrain pieces of sufficient quality for sale to fellow wargamers. A D-Day bunker and Normandy boccage were two projects I did preliminary work on, but the one that came closest to fruition was the Pontoon Bridge. As you may recall from the earlier Hussars, CHARGE!, one of my interests is the Napoleonic era. It is a genre well represented (oh hell, over represented) by various manufacturers. At the time however, no one (that I recall) was producing a 15mm pontoon bridge set. I decided to rectify that. There was not a lot of info out there on the pontoons, but I did find a description in one of my books that gave the dimensions in metric. As 15mm was nominally 1/100th scale, it was a breeze to reduce the measurements to millimeters, and produce a scale drawing. From there I was able to use Evergreen Scribed Styrene to make some master models.


 My plan was to make rubber molds from these masters, then produce resin casts. I figured two pontoons and four roadway decks would make a nice starter pack for sale.

This is actually two deck sections, I placed them together to make casting easier. I distressed the ends of each individual board, as well as adding wear and tear to the center sections.
 
 The mold with the masters in place. The small piece is an add-on extension to reach the river bank.
 
 
The other half of the mold. You can see the deck 'damage' quite clearly here.


 The molds came out fine, but I could never make a perfect cast. There were incomplete filling, voids and bubbles, and the decks never got truly hard. There were several reasons for this--- the resin was out of date, I didn't stir it properly, and this resin wasn't appropriate for the thin deck cross-sections. I ended up with two pontoons that were salvageable, and a couple of deck sections. I was majorly disappointed, and put the whole project away in a drawer. Let's fast forward a few years. I was culling my unfinished projects, and ran across this drawer. Guess what, the decks were still flexible, never hardening. I won't say I agonized, but throwing away that mold was not easy. The mis-casts not so much. But I couldn't bring myself to part with the masters, so I threw them in the Artillery Drawer.
Where they languished for another year, until...........


............a week ago. I was determined to finish this bridge. Here are all the original masters. I felt I needed at least three more pontoons, but making new molds and casting them was out of the question. I had given up on trying to make a business out of the hobby, and making new ones from scratch would be faster anyway.
 
Taking measurements off the originals, I cut out all scribed styrene first, then assembled them.
 
The roadway decks on the left are new, and you can see they are longer than the originals. These are to go from the pontoon to the bank. The original (short) extension and decks were glued to the pontoons. You can see the battle damage to the one pontoon and the long decks.

 I now have the flexibility to make a one pontoon bridge,
 
 
 a two pontoon bridge,
 
 (guess where I'm going with this) a three pontoon bridge,
 
 (right, right) a four pontoon bridge,
 
 
 (Red Fish, Blue Fish) and finally, a five pontoon bridge.
 
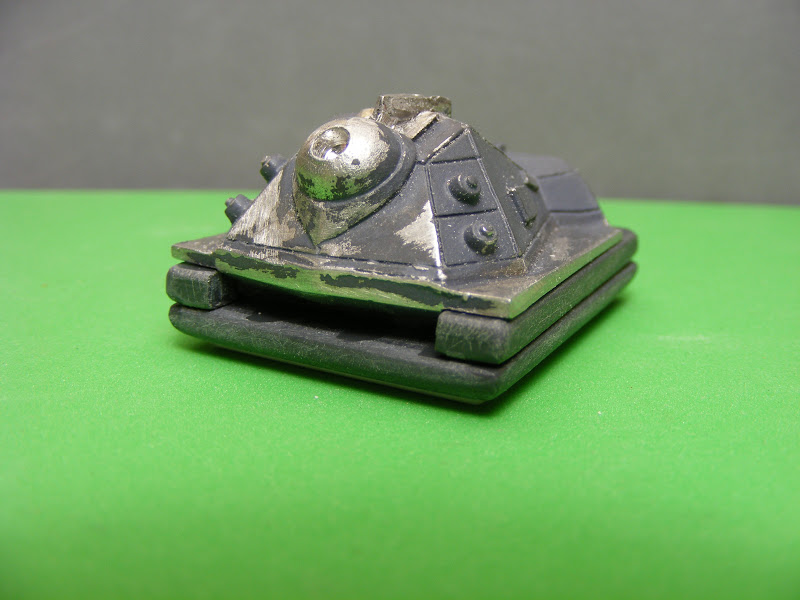
The Napoleonic minis I collect now are 18mm, but they scale well with this bridge. The width of the deck is the same as the frontage of my figures' bases. Here is a Russian 12pdr gun (by AB Figurines) for reference. (Apple green gun carriages, you gotta love the Russians.)
 
And surprise, surprise, they are already 90% painted. I know, I can hardly believe it myself. I'll be returning shortly with pictures in Technicolor® splendor. Thanks for looking, Don
 

Saturday, November 10, 2012

That Arab OGRE, Pt. 4

Just a quick update, I added skirts and a turbo jet to the rear section. I figured one, but slightly larger, jet should be sufficient to propel it.
 
 The complete OGRE. At the front I've added some styrene strips to fill the gap that was originally going to be an air inlet. But I felt it made the front too vulnerable, and OGREs need a solid front for smashin' up things anyhow, right? I will carve it to match the standard Mark III profile.
 
Though not 100% satisfied, This is the arrangement I am going with (though I may tweak the tower). I need to get this thing finished up and painted. Thanks for looking, Don.


Tuesday, November 6, 2012

That Arab OGRE, Pt. 3

What? I did what?  Yep, after playing with the variation from the last post for a day, I decided to hit it out to left field. Right or wrong, canon or not, something about a Middle Eastern OGRE just said "hovercraft" to me. ........So, here we are.


Something as big as an OGRE requires a two layer skirt, each layer consisting of individual outer chambers connected to a central plenum. (That way a single hit would not compromise the integrity of the entire skirt. How many chambers........... the same as the number of tread units on a standard Mark III. How convenient.) The exterior is covered by a flexible membrane.


Hedging my bets, the hover section is not permanently attached. Two magnets and a registration pin hold it firmly, yet allow removal (no easy task).
 
 
 The 'scimitars' are placed horizontally, protecting the front sections of the skirt.
 
 
 The 'shark fin' is shorter and more vertical.
 
 
 The large turbofans that propel this monster around. Their guts have yet to be finished.
 
 
 There will be movable vanes in the angled exhausts to steer this beast.
 
 
This  central joint  has been 'beefed-up' to include an air-intake to the front and rear plenums. That way this single fan can raise both front and rear.
 
 
OK, let me have it!       I await your comments. Don

Friday, November 2, 2012

That Arab OGRE, Pt. 2

I got a lot of good feedback on the previous post, thank you all. After letting things stew for a day, I thought I'd try one more idea. What if the scimitar didn't include the Main Gun, but was merely the tower? I've been trying to re-invent the wheel, when all I needed was to add a spinner. Or something like that. Sooooo...........one more profile, smaller and this time, made out of brass. (I love to work in brass, I just wish I had all the proper metalworking tools. I have discovered a sanding drum in my Dremel removes brass faster than the grinding wheel. I just treat it as 'very hard plastic'. ) 


I cut slots the thickness of the brass along both sides of the triangular base, then CA'ed them in place. I clipped the top sensor off a 'swimming OGRE,' drilled a hole in it, and attached it to the top. If this does turn out to be the accepted version, I will flow solder into the bottom joint, then bend the two pieces so the top (front) sides touch. The bottom (rear) sides will remain flared out.


One other thing has occurred to me, while we're in the Middle East. There will be many areas where sandy terrain might make tracked vehicles like Mobile Howitzers and Missile Tanks difficult to maneuver without bogging down. So I'm considering  Extra-Large GEVs. This is an early mock-up to help me come up with correct sizes. This blank is slightly longer than the PE's biggest GEV, the Seguro GEV-PC, and about twice as wide. Opinions?


That's all for now. Keep the comments coming.
 
Oh, and Ashley, er I mean Bruce, I dis-figured the OGRE above just for you. Not much, but..........baby steps, baby steps.
Don

Thursday, November 1, 2012

That Arab Ogre

Well, it's been a few days, and the consensus confirms what I was already feeling----the scimitar tower overpowered the OGRE.  I had gone ahead and 'fleshed-out' it out, and it seemed even larger. I then went on a sanding binge to reduce its size, and while an improvement, was still too big. ....I think, you tell me.


Here were the steps to make a 3-D tower. First I tapered the eighth inch central strut. Next I made four identical scimitars out of .030 styrene. I also made four pieces of the lower third of the scimitar. I glued two full-size pieces directly to the sides of the central strut, establishing the profile. Then came two of the small pieces, followed by two more full-size, and finally the last two small ones. (These helped create the 'flare-out' at the bottom.)  You can easily see that I lowered each successive layer onto the ball of the Main Gun. What you can't see is that the circular cutouts at the bottom of the scimitar became smaller as well, creating a spherical hole to hold the ball.

Front............


.................and back.
 
 
Finally I added two outer pieces without a cutout. and some thin .020 styrene to cover the laminations.
 
 
 Here is where I ended up after the sanding binge. It could be sanded a little smaller (or even re-made smaller), but unless I am willing to cut up the whole front, it will still sit too far forward. And as SJ Games no longer produces the plain Mark III, I am very reluctant to do that. (The Mark III-B is the only OGRE they still stock, and it was only available to the Combine and its allies anyway.)
 
 
 So, I need to come up with some other ideas. First I made a new tower, the same height as the original, but thinner with a curved front. Next I made some new-profile scimitars that were shorter, with a more pronounced curve.

Example 1.  Here the pieces are separated, and surround the front four AP guns.


Example 2. Here the profiles remain attached to each other, in a flat plane. They surround the Main Gun.


 Example 3. Similar to above, but the profiles angle back.


Example 4. In the above three examples, the 'hand grip' portion touches the tower. Here they do not. Actually, if this is the way I go, I'll probably eliminate the tower. It is a little hard to see here, but the two pieces do angle back a little.


So, which of these four do you like? Thanks for looking, and questions and comments always welcome. Don